-
Openstack Provider Network for a project by Horizon UICloud/Openstack_K8s_Docker 2020. 5. 15. 01:40

In this chapter, we are going to create an External network. A member user in a project can create and modify internal network but only the admin user can create an external network.
Now this is a network environment on this current step. we are going to configure the green line network on Openstack, not Linux host.

<Ex network Creation>
1. Admin > Network > Networks > Create Network
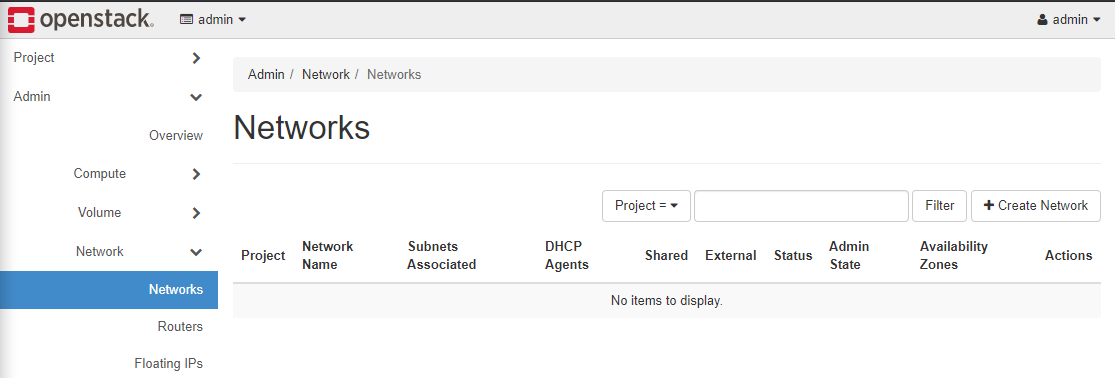
2. Set Name, Project, Network Type, Physical network > Next
Project : admin, this is external network. external network is connected to all internal network. it should be in the admin.
Provider Network Type : Flat, External Network Type is Flat
Physical Network : extnet, the name for this network defined in the given packstack answer file.
Shared : shared by all tenants
External Network : connected to external network
Create Subnet : continue to create subnet
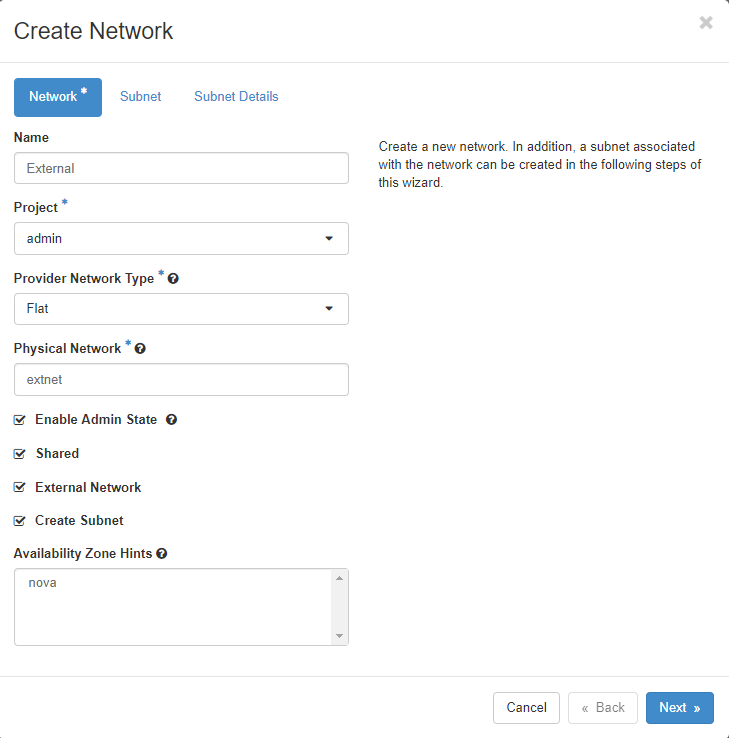
3. Subnet Creation > Next
Network Address: 192.168.1.0/24, External network is flat and bridge-mode in Oracle VirtualBox. 192.168.1.0/24 is Home AP network.
Gateway IP: 192.168.1.254/24, Gateway IP is the AP
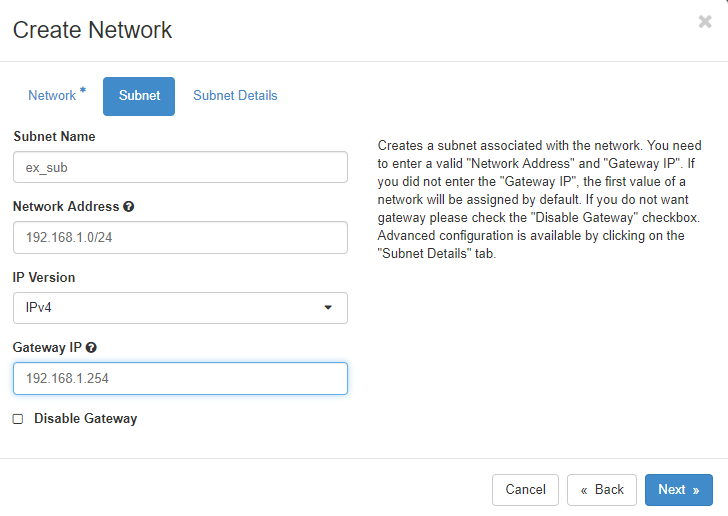
4. DHCP pool
This IP pool is used for Floating IP. Floating IP allows instances to get External IP.
If Externel network is public network having public IP, an instance can get public IP. It's like AWS Elastic IP.
I set the range from 192.168.1.130~192.168.1.199. DNS server IP is 8.8.8.8. it's google DNS.
*Caution: NO SPACE for the range. 192.168.1.130,192.168.1.199

<vRouter creation>
I name this vRouter as Internet Gateway or L3 agent. this router will interconnect VMs and internet by NAT.
Let's create this router as Admin user in Admin.

1. create Router > Create Router
I configured this router for demo1 project and defined External network.

2. look for the result of the creation of R1.

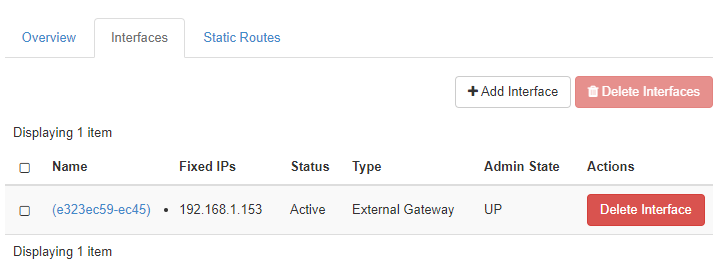
3. look for the interface between external network and router.
Admin > Network > Routers > R1 > Interfaces
<Floating IPs creation>
1. Admin > network > Floating IPs > Allocate IP to Project

2. Pool : External > Allocate IP
To create three external IP, repeat 2 times.
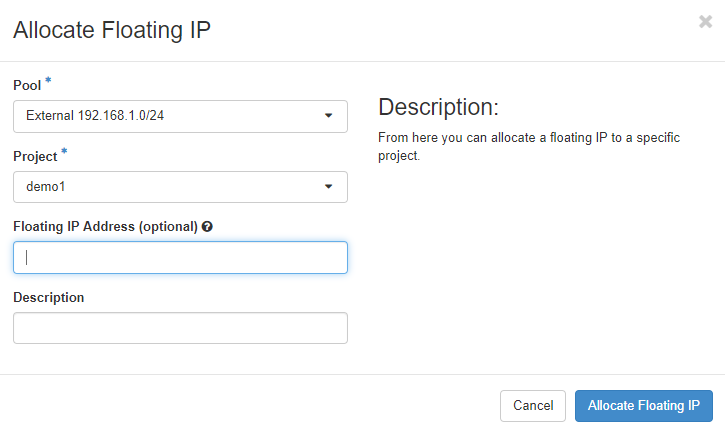
Totally three IPs were created.

What is the purpose of Floating IP? Why Floating IP is needed?
If an instance has floating IP, a user can directly access an instance from External network.
the packet journey is like :
1. External Network > 2. Router > 3. Internal Network > 4. Instance.

<Current Network step>
We created and configured the Provider network(green). We need to create and configure internal network(Orange) and router for connection both external and internal.
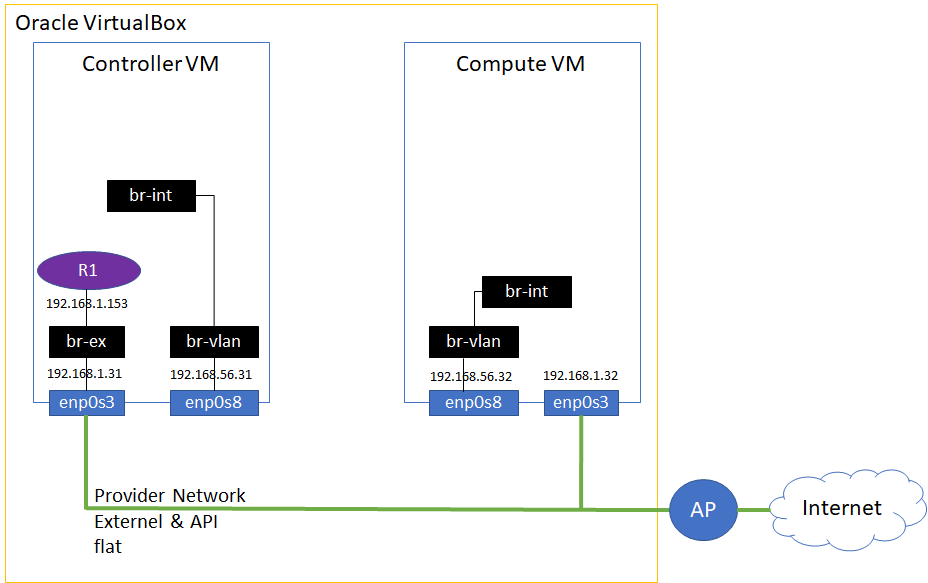
You can now ping to R1 from your laptop.

Let's move on to creating the internal network and a router!
'Cloud > Openstack_K8s_Docker' 카테고리의 다른 글
Openstack instance creation by Horizon UI (0) 2020.05.16 Openstack Tenant Network for a project by Horizon UI (0) 2020.05.15 Openstack configuration for a project by Horizon UI (0) 2020.05.14 Openstack Train Installation on Oracle Virtual Box (3) (0) 2020.05.12 Openstack Train Installation on Oracle Virtual Box (2) (0) 2020.05.11