-
Openstack Tenant Network for a project by Horizon UICloud/Openstack_K8s_Docker 2020. 5. 15. 19:43
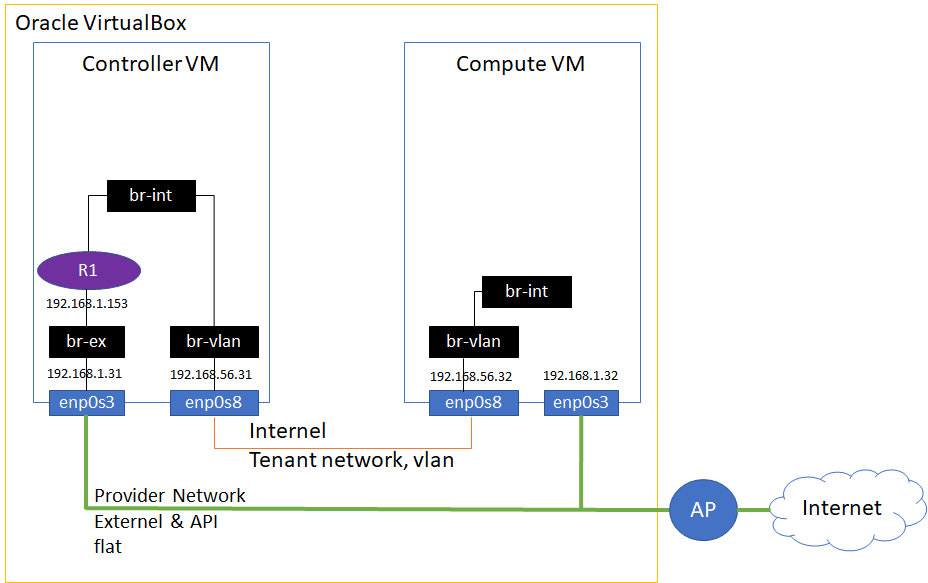
<Openstack Network Status>
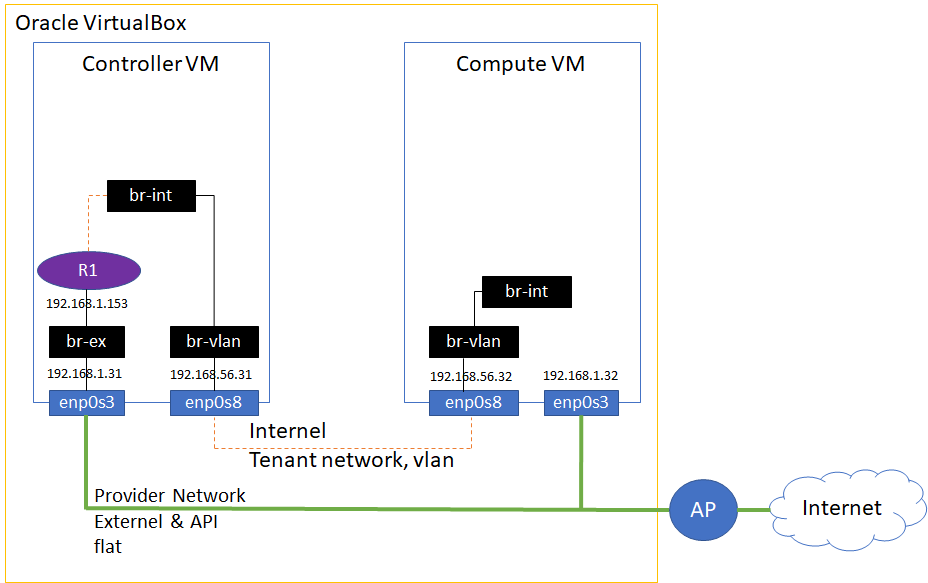
We are going to create the tenant (internal) network. We already created one tenant and user for the tenant.
if you forgot it, refer to Openstack configuration for a project by Horizon UI
<Tenant Network Creation>
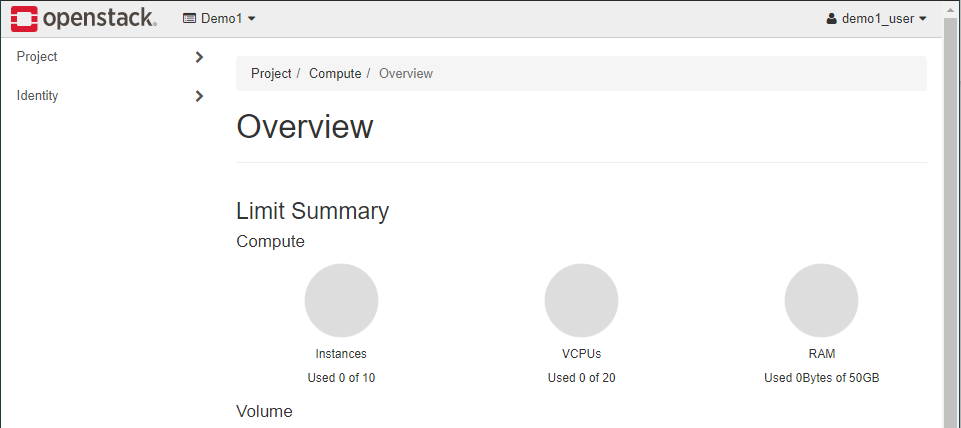
1. Log in as a created user (demo1_user)
We cannot see the Admin row bar because this user is a member user for a tenant.
This project's name is Demo1. You can see the project name on the top beside of Openstack logo.
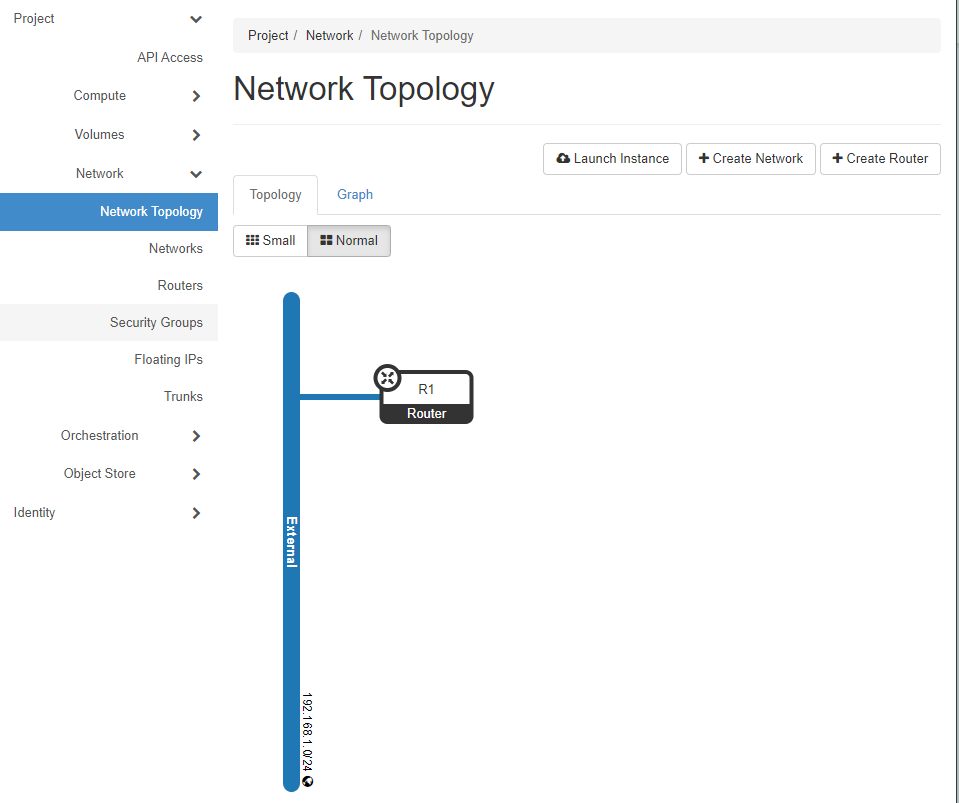
2. Current network status view.
Project > Network > Network Topology
Openstack only has External Network which is shared for all tenants.
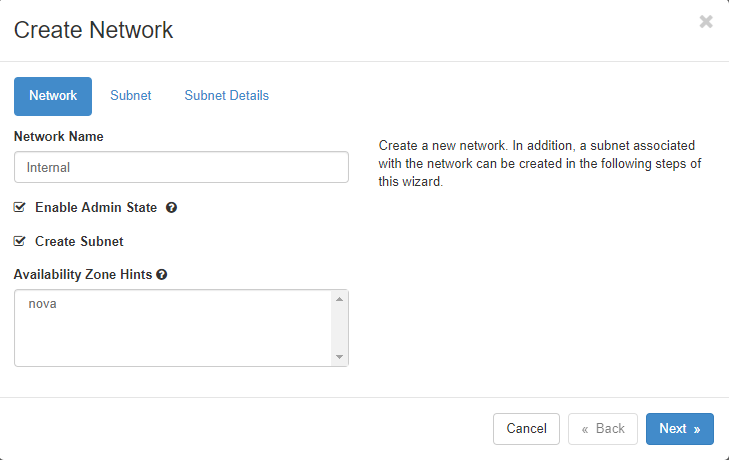
3. Creating an internal network
Project > Network > Networks > Create network
You can set the network name for internal. in this case, I named 'Internal'.
you can move one to create Subnet in this internal network by 'Next'
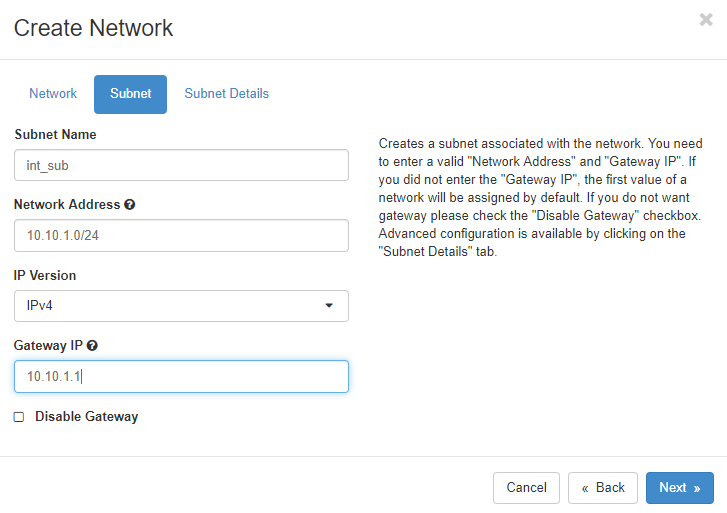
4. Creating Subnet
I am creating subnet range 10.10.1.x/24 mask. All the instances will have IP addresses within this range.
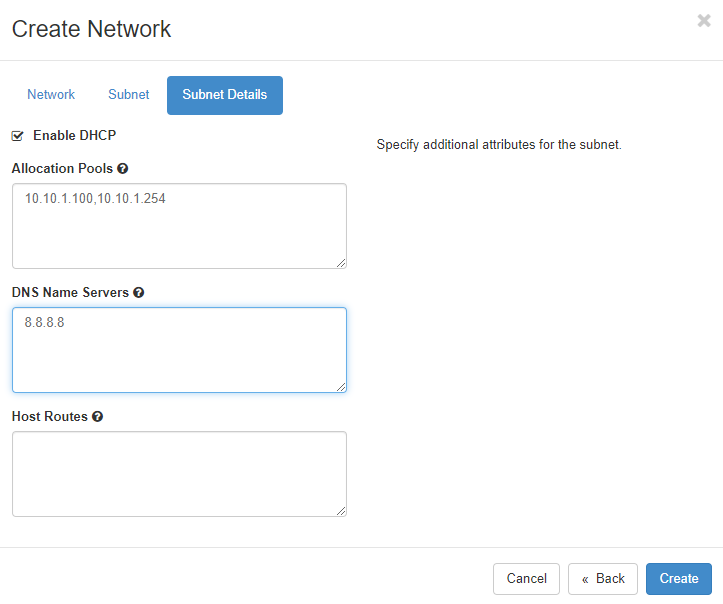
5. Creating Subnet Details > Create
I will set DHCP range from 10.10.0.10~10.10.254.254.
I will give 8.8.8.8 DNS server IP to all Instances.
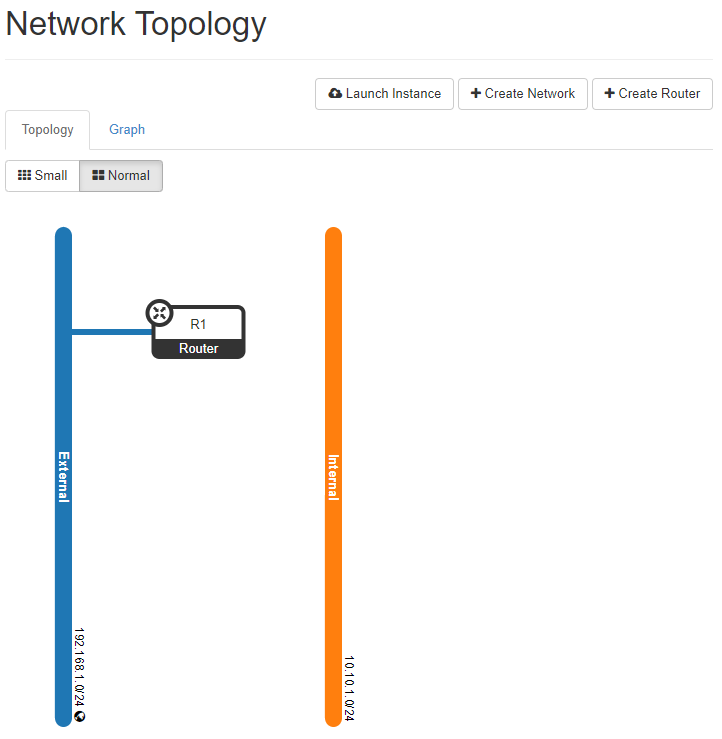
6. Checking it.
The internal network is created. it is not shared with other tenant and of course, it is not an external network.

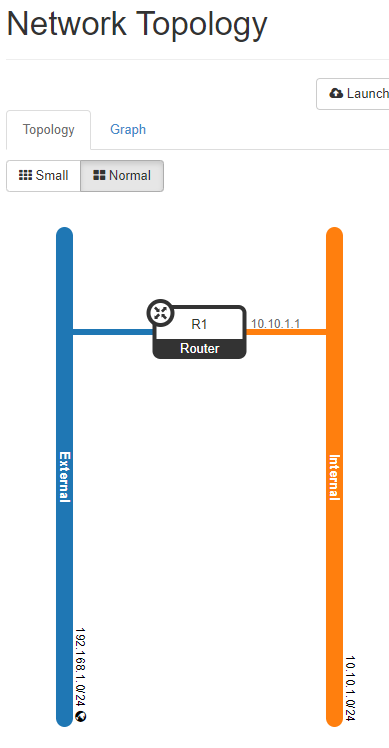
If we look at network topology, we can see two lines for external and internal.
These two networks are not connected to each other. We need a Router to make a connection between the external and the internal network
<Adding interface for internal network on Router>
a Router is used for connecting an internal network to an external network
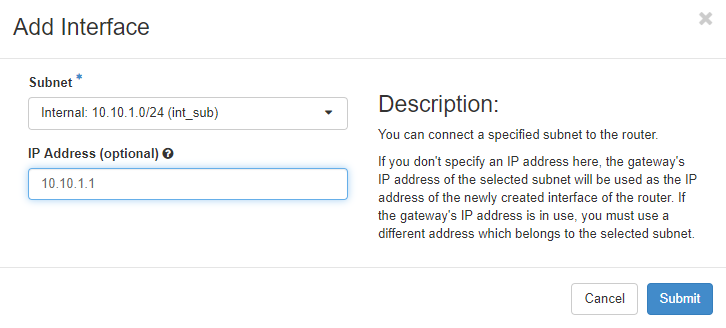
1. Add Interface
Project > Network > Routers > R1 > Interfaces > Add Interface
I add the interface as a gateway to this tenant. it has 10.10.1.1
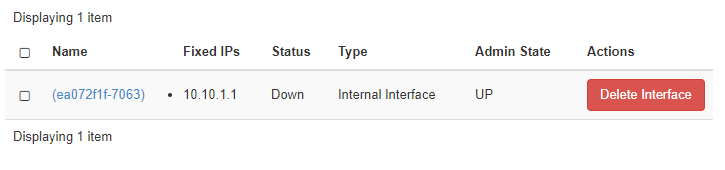
2. result
<Security Group>
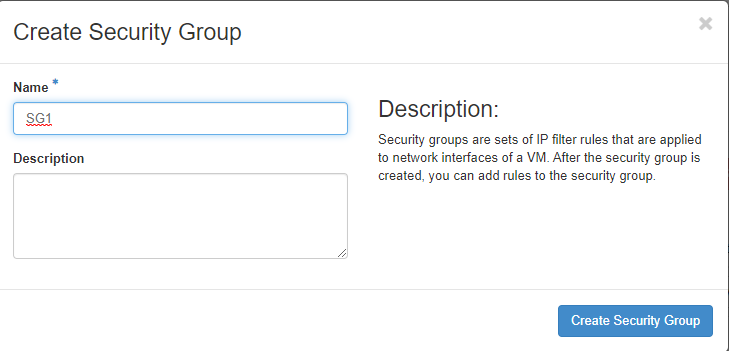
1. Project > network > Security Groups > Create Security Group

2. Set the Name of SG > Create Security Group
SG is an IP/Port firewall for Instances(VM). Several Instances can use one same SG or can have different SG.
3. Check up the firewall rules of SG
All the packets are permitted for Egress by default. and Inbound all deny.

4. Add rules for SSH and HTTP and ICMP > Add
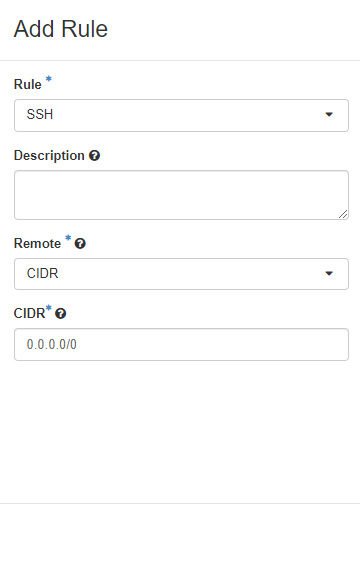
5. Check up the created rules.
I opened ICMP, SSH, HTTP for VMs managed by this Security Group

<Key Pair creation>
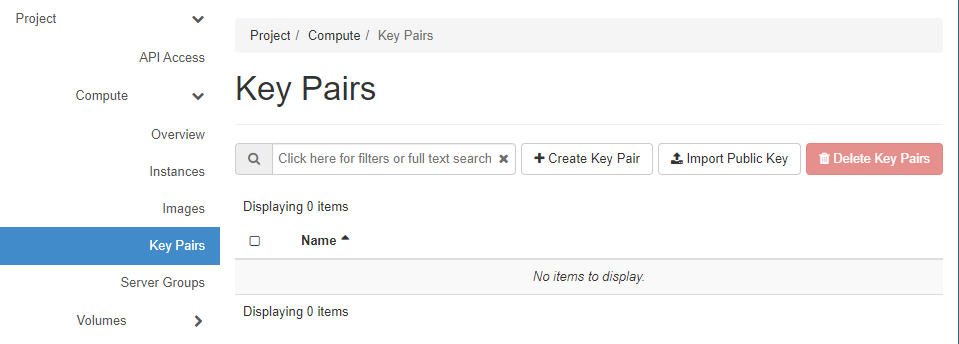
1. Project > Compute > Key Pairs > Create Key Pair.
Key Pair is used when you and a user access VM through credentials. if you does not apply this to instance, you can access instance without credentials. but it is not recommended.
* This current Key Pair creation step is for only Admin's Project. Admin also can have a project as a user. in this step, just showing how to create Key Pair for a tenant or admin user. we should create Key pair one more for Demo1_user which we created.
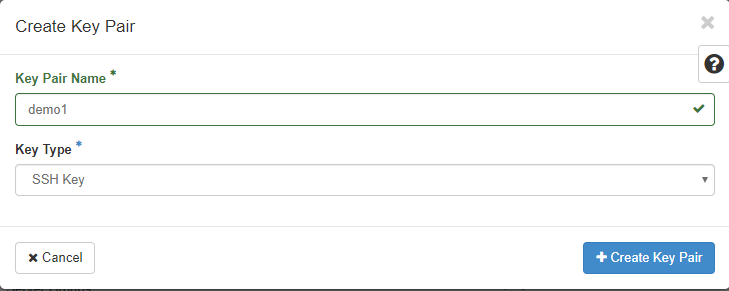
2. Set the Key Pair Name and Key Type > Create Key Pair
SSH key is normal. I will use SSH key.
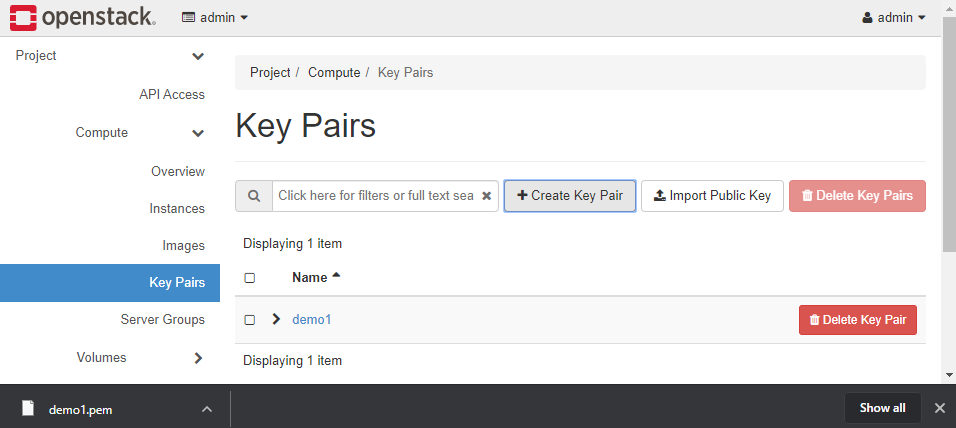
3. You downloaded SSH public key(demo1.pem) for accessing instances.
When you are trying to access instances, you are going to use this credentials for accessing instances by SSH.
<Openstack Topology>
Now we are ready to create instances!
'Cloud > Openstack_K8s_Docker' 카테고리의 다른 글
Openstack instance access by CLI or Putty (0) 2020.05.22 Openstack instance creation by Horizon UI (0) 2020.05.16 Openstack Provider Network for a project by Horizon UI (0) 2020.05.15 Openstack configuration for a project by Horizon UI (0) 2020.05.14 Openstack Train Installation on Oracle Virtual Box (3) (0) 2020.05.12